I used to be the kind of person who thought
breakfast was not worth the hassle and time could be better spent in bed.
Instead I would grab a cup of coffee and eat calorie dense foods throughout the day. But I was wrong, very wrong. I was setting myself up for a
lethargic and nutrition-less day. A few months ago I established a
morning routine that includes fueling my body with a healthy homemade breakfast
such as waffles, french toast or homemade bread and jam. Since this change, I
have more energy and eat less during the day. I learned breakfast is just as
important as dinner.
When I first set out to eat a healthy breakfast, I stuck only
to the basics such as cereals and toast, however they did not fill me up for
long. I tried store bought waffles but they were expensive, flimsy, small, and
tasted like processed air. So I started making my own! It was a little daunting
at first, because I assumed the process was difficult and time consuming but I
was shocked at how easy they were to make. All you have to do is measure and
mix the ingredients then scoop into a waffle maker.
If you do not have a waffle maker I suggest
investing in one. I bought mine for around 30 dollars at Walmart. It already
paid for itself from money saved not buying store bought frozen waffles. To
purchase the waffle maker I have click here.
If you have a waffle maker lets
begin!
Before you begin turn the waffle maker on to warm
up so it is ready for use later. Determine how dark or light you want your
waffles then adjust the setting accordingly.
You will need:
Flour (all purpose & whole wheat), Stevia, egg
whites, unsweetened vanilla almond milk, vegetable oil, baking powder, salt,
two mixing bowls, a mixing spoon, plastic spatula, and measuring
cups.
Waffle maker (not pictured)
Swap: You can swap 2 eggs for egg
whites, cow's milk for almond/soy/rice milk, Earth Balance
butter for vegetable oil, and sugar for Stevia

Step 1: Mix all the dry ingredients together.
2 cups flour (1 cup whole wheat, 1 cup all purpose)
2 tablespoons Stevia
1 tablespoon baking powder
1 teaspoon salt
Step 2: In a seperate bowl mix the wet ingredients.
6 tablespoons egg whites
1 3/4 unsweetened vanilla almond milk
1/3 cup vegetable oil
Optional: toppings
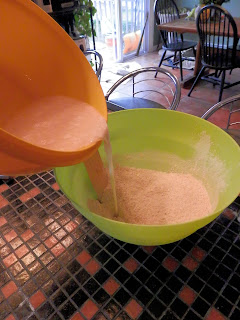
Step 3: Combine the wet and dry ingredients and mix.
 |
| As a general rule do not stir the batter too much. Mix the batter just enough to remove most of the clumps. The batter should be smooth but it is okay if some clumps are left. |
Now is the time that you can mix in any toppings such as chocolate chips, raisins, or cranberries. The options are limitless. You are making your own waffles, so think beyond what you have seen in the store and on breakfast menus. The more you gear the waffles to your taste, the more inclined you will be to make time in the morning for breakfast. Because these are for three different people, I prefer to make them plain then add toppings later.
Step 4: Scoop the batter into the waffle maker
Follow your waffle maker's manual to determine how
much batter is needed for each waffle. My manual states 1/2 cup per
waffle. Any more and the batter will spill out the edges making for a messy
clean up and wasted food. Don't worry if every inch of the maker is not covered
in the batter.
Check your waffle maker's
instructions to determine how long the waffles take to cook. My machine does
not give an exact length of time, but they can be removed once the machine is
done steaming, which usually is 2-3 minutes.
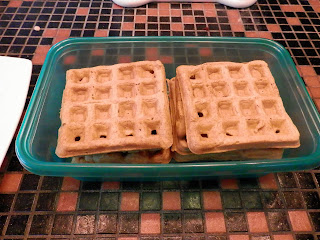
Carefully take them out the machine with a
plastic spatula as not to scratch the non-stick surface. They should come out
very easy.
Toppings: Anything goes with waffles
because they are a versatile food. Breakfast, lunch, dinner, or a snack
- you can incorporate them into any meal. Eat them traditionally for
breakfast or as dessert with ice cream or fresh fruit. In the southern states
they eat waffles for dinner with chicken or steak! Try maple agave, honey,
peanut butter, my homemade syrup (coming soon!) or spread homemade jam.
Quick clean up tip: Put
away the ingredients as they are added to the mix. I take out all the
ingredients before I start and then put them away once they have been used.
This way by the time I am ready to pour the mix into the waffle maker, the
counter is clutter free and dishes are in the sink. While the waffles are in
the machine start doing the dishes and wipe the counter down with a reusable
rag. Keep an eye on the waffle machine, but you generally have 2-3 minutes
before each batch is done. You will be amazed at how much you get done in that
in that time!
Waffles on the go: Spread jam, maple agave,
or peanut butter on top and fold over to make a sandwich. You can also make
waffle dippers by pouring syrup into a small container and cutting the waffles into
bite size pieces for dipping.
Check back later this week to learn how to make
homemade syrup!


No comments:
Post a Comment